 Muy Bueno: Fiestas
 Ojo de Dios (God’s Eye)
You may have noticed that my recent DIY crafts have a religious theme, and you’re right! The timing is perfect with Easter just right around the corner.
This craft has been around for many generations and you may have made Ojo de Dios, or God’s Eyes, in Sunday school or summer camp. Just like the ones you might have made as a kid, we kept ours simple. However, if you are looking for a more challenging version or step-by-step details, you can find many lovely and intricate designs on the internet.
The history of Ojo de Dios varies somewhat as many have adopted the craft and converted the meaning to their respective cultures. However, most sources agree that the craft originated in western Mexico with the Huichol Tepehuan Indians.
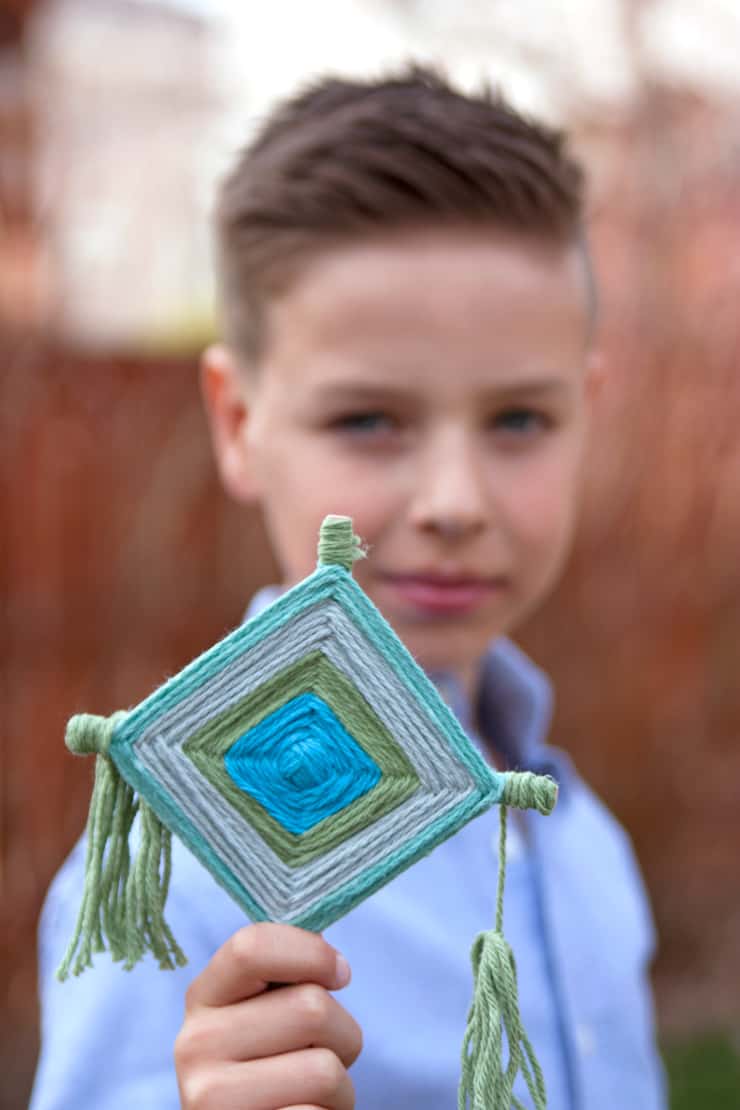
The four points represent earth, fire, air, and water, and provided God’s watchful eye over their people. The Huichol Indians made these decorative or ceremonial “shields” using sticks and colored yarn. These shields were named Ojo de Dios because through them, God can keep a watchful and protective eye on the people who made them.

In celebration of Easter, create your own fun-filled and colorful Ojo de Dios for power and protection!

There is no right way or wrong way to make these. Just like our homemade God’s eyes we are all beautiful and different, and no two are alike.
This project is great for family, classroom, or group craft time. It requires no patterns and uses simple materials. With little preparation, this project is easy and fun for children.

SUPPLIES:
- Yarn, at least 3 different colors.
- Sticks: chopsticks, popsicle sticks, broken branches, or toothpicks
- Glue (optional)
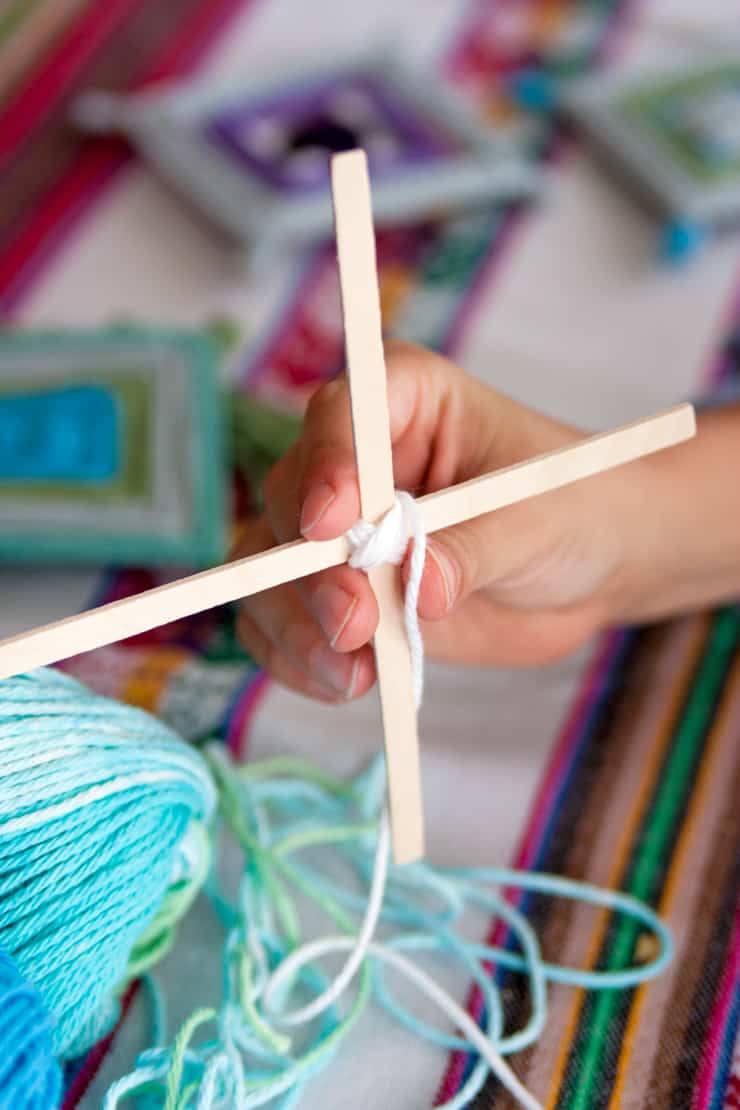
- Tie the sticks together to create a cross (or glue). Wrap the yarn around the sticks center in an X. Cover the center as completely as possible.
- Once the center is covered weave the yarn around each stick; the pattern will get larger as you progress. When you are ready for a new color, simply tie off the color and then tie the new color to the same stick.
- When you are finished remember to leave enough string at the end and tie a loop to hang from. You can choose to tie tassels, beads or even feathers to the ends!
Photography: Yvette / DIY: Thrifty Rehab

2 Comments on “Ojo de Dios (God’s Eye)”
Beautiful, both the eye of God and the model. I had forgoten this beautiful craft. I think you made one when you were in school. Right?
How fun, I remember making Gods Eyes as a kid. Blake’s matches his super gorgeous blue eyes!